

Your favorite apps, such as Instagram & Spotify, were all created by people… who were once beginners. No one is born coder, everyone learns step by step along the way.
Android powers over 70% of smartphones worldwide, with more than 2.5 billion active devices.
If you also want to create an Android app and want to see it on the Google Play Store. You are at the right place.
You don’t need to be a pro coder to begin. All you need is some patience, the right guidance, and excitement to build your first Android app from scratch.
Why Choose Android App Development In 2026?
Huge market reach:
Android alone makes up 71% of the global smartphone market, with over 130 million users in the US alone. Hence, we can say the app we built can reach millions of potential users.
Easier to start:
Unlike iOS app development, which needs a Mac, Android development works on Windows, Mac, and Linux. Additionally, Google Play only charges a one-time $25 fee, whereas Apple’s App Store requires a $99 annual fee.
Free tools:
One of the biggest advantages is that you can start developing an Android app without spending a dime. As ‘Android Studio’ is the main tool for building apps, which is completely free.
Growing job demand:
With the growing demand for software development in 2026 makes Android apps are a good choice 2026. Depending on the experience, Android developers earn $70,000 to $130,000 a year.
More creative freedom:
Android’s Play Store has fewer restrictions than iOS, giving you more room to create and publish your app freely.
What Do You Need To Make An Android App?
The best part is that you don’t need expensive equipment or software to build an Android app.
Hardware Requirements:
Computer:
Windows 10/11, macOS 10.14+, or Linux
RAM– 8GB minimum (16 GB recommended)
Storage– 4GB free space
Screen– 1280 x 800 minimum
Android Device (Optional, but Recommended):
A phone/tablet helps test real-world performance through EMULATORS in Android Studio.
Software Requirements:
Android Studio:
Android Studio is one of the best mobile app development software options available today. Use this free official development tool. Such as code editor, layout editor, emulator, debugger, and build tools.
Java Development Kit (JDK):
Version 11 or higher (usually installed automatically with Android Studio).
That’s all, you don’t need any other expensive licenses or extra software. Now you are ready to start coding your first Android App.
How To Build Your First Android App (Step-by-step Guide)
Let’s walk through creating a simple but functional Android app.
This tutorial creates a basic app that displays a greeting message and responds to button clicks, perfect for understanding core Android concepts.
Step 1: Install Android Studio
This is the first and foremost important step, setting up Android Studio on your computer.
- Download Android Studio
- Run the installer
- Install the recommended SDK
- Wait for the setup to complete (may take 15-30 minutes)
Step 2: Create your first project
This step involves creating your first project.
- Open Android Studio and Click on ‘New Project’.
- Choose the ‘Empty Activity’ template.
- Name your app (eg, ‘My FirstApp).
- Choose ‘Kotlin’ as the programming language
- Set the minimum SDK to API 24
- Click ‘FINISH’ and wait for your project to set up.
Step 3: Design your user interface
This Step involves designing the layout of your app’s main screen. Below are the steps:
- Open activity_main.xml, the layout file for your app’s main screen.
- Switch to the “Design” view to see the layout options.
👉Explore Web application Development to expand your coding skills and build apps that work across browsers and devices.
Step 4: Write your first code
Switch to MainActivity.kt in the app/java folder. This is where you write the code that makes your app functional.
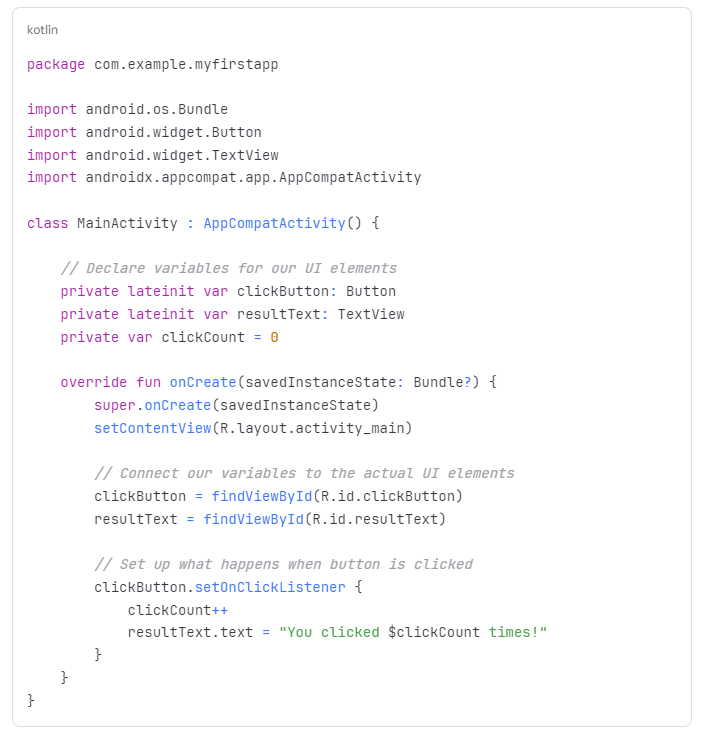
Understanding the Code:
- class MainActivity : AppCompatActivity() – Defines your main screen
- onCreate() – Runs when your app starts
- setContentView() – Connects your code to your layout file
- findViewById() – Locates UI elements by their ID
- setOnClickListener – Defines what happens when the button is clicked
- clickCount++ – Increases the count by one
- resultText.text = … – Updates the text shown on screen
Step 5: Run your App
This step involves testing that can be done in two ways:
Option 1: Use the Emulator (No Phone Required)
- Click the “Device Manager” icon in Android Studio
- Click “Create Device”
- Select a phone model (Pixel 5 is a good default)
- Download a system image (Android 11 or higher recommended)
- Finish the setup
- Click the green “Run” button in Android Studio
- Wait for the emulator to boot (first time takes 2-3 minutes)
- Your app will automatically install and launch
Option 2: Use Your Physical Android Device
- Enable “Developer Options” on your phone (tap Build Number 7 times in Settings > About Phone)
- Enable “USB Debugging” in Developer Options
- Connect your phone to your computer via USB
- Click the green “Run” button in Android Studio
- Select your device from the list
- Your app will install and launch on your phone
Common Beginner Mistakes to Avoid While App Development
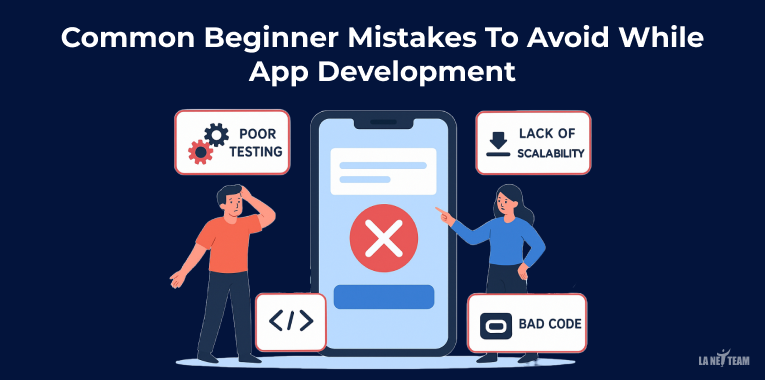
Learning from others’ mistakes accelerates your progress. Here are pitfalls to watch out for:
Mistake 1:
Not Testing on Real Devices
Emulators are convenient but don’t perfectly replicate real-world conditions. Test on actual phones to catch performance issues, touch responsiveness problems, and real network conditions.
Mistake 2:
Ignoring Memory Management
Holding references to activities or contexts can cause memory leaks. Always clean up resources in onDestroy() and be careful with background threads.
Mistake 3:
Blocking the Main Thread
Never perform long operations (network calls, database queries, file operations) on the main thread. This freezes your UI and frustrates users. Use coroutines or background threads instead.
Mistake 4:
Hardcoding Text and Values
Always put strings in strings.xml and dimensions in dimens.xml. This makes translation and multi-screen support much easier later.
Mistake 5:
Not Following Material Design Guidelines
Google provides comprehensive design guidelines. Following them makes your app feel professional and familiar to users.
As you gain confidence, you can explore cross-platform tools like Flutter vs React Native, both let you build apps for Android and iOS with a single codebase.
Conclusion
Your first app won’t be perfect, and that’s totally okay. What matters is downloading ANDROID STUDIO today, following the above-mentioned steps, and building your first simple app.
Remember that every expert Android developer started exactly from Zero. As you practice, you’ll see how each stage fits together, just like in the Mobile Application Development Process.