

Remember the time you ordered food through an APP.
You didn’t just see the Dish that you wanted to order…. But you also got suggestions like ‘add a drink’ or ‘try this dessert’. This small suggestion made the EXPERIENCE smoother and more tempting.
That’s exactly how the MOBILE APP DEVELOPMENT PROCESS works. It helps in creating an experience that users enjoy and want to use again.
Did you know 90% of smartphone users are more likely to continue shopping if they have a great user experience?
What Is a Mobile App Development Process?
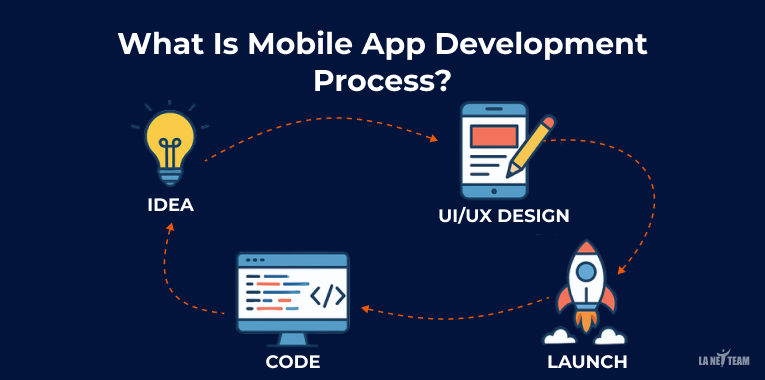
The mobile app development process is a detailed series of steps and stages that developers follow to create an app that users can use. The process involves designing, coding, testing, and launching apps that provide smooth user experience.
Here are the reasons why its useful:
- Helps businesses connect directly with their customers.
- Increases brand visibility and customer engagement.
- Opens new revenue streams through in-app purchases or ads.
- Improves customer service with instant access and support.
- Provides personalized user experiences based on data and preferences.
- Allows businesses to stay competitive in a mobile-first world.
- Offers flexibility to scale and add new features as user needs grow.
The Complete Mobile App Development Process (7 Simple Steps)
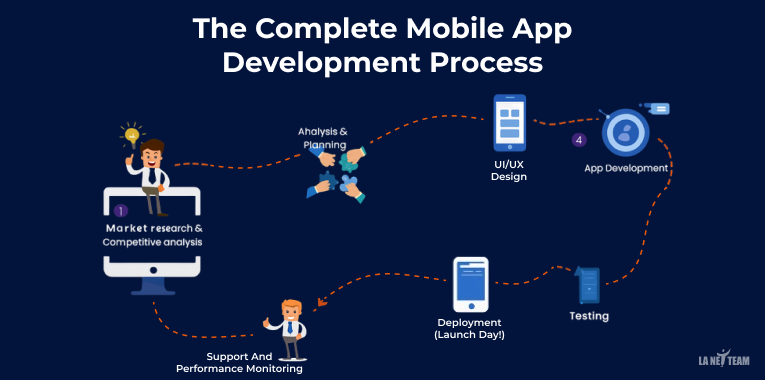
Building a mobile app is complicated, but when you break it down into clear steps, the process becomes much more manageable.
Step 1: Market research & Competitive analysis
Before you start building an app, it’s essential to know your users who will use it. Additionally, analyze competitors, study their strengths and weaknesses to identify the gaps in the market.
Tools to help:
App Annie, Sensor Tower, SimilarWeb
Choose your Platform
You have three main options of platforms:
- iOS (iPhone/iPad):
This platform is perfect if your target users primarily use Apple devices. Did you know iOS users typically spend more money on apps? Hence, making them ideal for premium or subscription-based apps. - Android:
It is the most used platform; therefore, you get to reach to large global audience. Android app development dominates the worldwide smartphone market. - Cross-platform:
This platform is built once and deployed to both iOS and Android. Using technologies such as Flutter and react native helps you save time and money.
As, these technologies write one codebase that works on both platforms. Cross-platform is the most popular choice for startups and businesses watching their budget.
Many businesses also go beyond mobile and expand into Web Application Development to create a seamless experience across devices.
Step 2: Analysis & Planning
Now that you have the strategy, it’s time to get into the details and a concrete plan for making a successful app.
Functional requirements:
In this, you list down every detail that the app needs to perform well. In short, these describe ‘what your app must perform’.
Let’s see an example: If you’re building a food delivery app, your functional requirements might include-
- Users can add items to the cart
- Users can place orders
- Can easily browse a restaurant’s menu
- Users can track their orders in real time
- Restaurants can update their menu in the app
- Delivery drivers can accept orders
Non-functional requirements:
These describe ‘how well’ your app performs. Non-functional requirements help in determining the quality of your user experience.
It includes:
- Speed: Pages should load in 2 seconds
- Security: User data must be encrypted
- Availability: App should work 99.9% of the time
- Scalability: The App should handle 10,000 simultaneous users
- Usability: New users should be able to complete tasks without help
Determine Your Technology Stack
Based on platform choice, you’ll need specific technical skills.
For iOS: Swift programming language, Xcode development environment
For Android: Kotlin or Java programming language
For Cross-platform: Flutter or react native
For Backend: Node.js, Python, Ruby, or PHP for server-side logic
For Database: PostgreSQL, MongoDB, or MySQL for data storage
👉Read More: Difference between iOS App development vs Android, which one to choose?
Step 3: UI/UX design
This step involves designing your app to make it look and feel good. Below are the things to keep in mind while designing.
Information Architecture
This is the fancy term for organizing your app’s content and navigation. In this, you are deciding:
What information appears on each screen?
How users move from one screen to another.
How data is grouped and categorized.
Where buttons and menus should be placed.
Wireframes
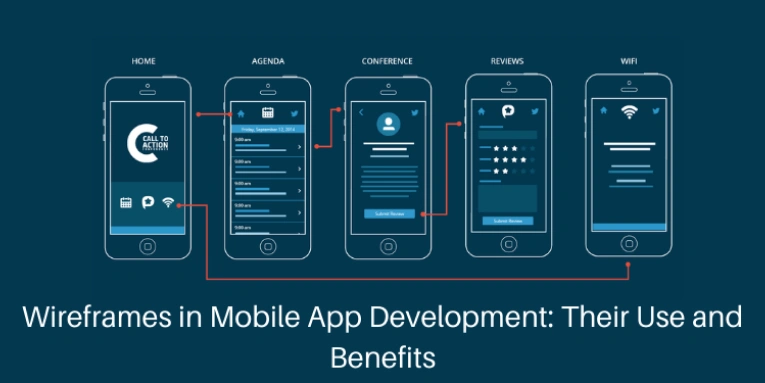
Wireframes are the simple black & white sketches of your app screen. They are the box lines and labels, showing where elements go.
It helps you in:
Imagine the layout of your app before investing in detailed design.
Get feedback quickly and make changes easily.
It ensures that all necessary elements are included.
Style Guide
The world displays that it is a guide to your app’s visual rulebook.
- Colors: It gives you the exact color for your brand colors.
- Typography: Which fonts to use and when.
- Buttons: How buttons should look in different states.
- Icons: Which icon style to use consistently?
- Spacing: How much spacing needs to be added between elements.
Step 4: App Development
In this stage, this is where developers write the code that actually brings an idea to life. Development typically happens in two parallel tracks:
Backend Development:
The Backend is what users don’t see, but that makes your app work.
Database:
It is where all your data is stored. Data such as user accounts, content, settings, transaction history, etc.
Server:
The computer is usually in the cloud that processes requests from your app. When a user logs in or posts content, the servers handle it.
API (Application Programming Interfaces):
These are the bridges that let your app communicate with the server.
Business Logic:
These are the rules and calculations your app follows.
Frontend Development:
The frontend is what users interact with; everything visible on screen.
You have 3 development approaches:
Native Development:
It is built separately for both iOS (using Swift) and Android (using Kotlin). Native gives the best performance and access to all the device’s features. Since you are building two separate apps for two platforms, it costs more.
Cross-platform Development:
It is built one that works on both platforms, iOS and Android, by using frameworks (Flutter) or (React Native). Developers have to write about 70-90% of the code once and reuse it on both platforms.
👉Read about Flutter vs React Native in detail.
Hybrid development:
It is essentially a website wrapped in a native shell. It is built with the technologies (HTML, CSS, JavaScript) and frameworks like Ionic or Cordova.
Step 5: Testing
This stage,‘testing,’ is very essential. Testing is done to catch problems before users do. Skipping this step or rushing it can lead to bad reviews, frustrated users, and costly fixes after launch.
Below are the types of testing that are done:
1. Functinality testing
This testing sees whether everything is working as planned. Can users be able to use the app without any errors? It includes testing Buttons, forms, and features.
2. Performance testing
This test sees whether your app is fast or responsive. It test:
- Measure load times
- Test with many simultaneous users
- Monitor battery drain and data usage
3. Security testing
This test sees whether your users’ data will stay safe in your app or not. By testing:
- Password test requirements
- Verify data encryption
- Check for common vulnerabilities
- Ensure secure payment processing
- Validate APIs security
4. Compatibility testing
This test sees whether your app works across different devices and OS versions or not.
- By testing:
- On multiple Android devices
- On various iPhone models
- Test different screen sizes and resolutions
- Test on wifi 4G, 5G, and poor connections
5. User acceptance testing (Beta testing)
This testing lets real users test your app before the official launch:
- By recruiting 20-50 people from your target audience
- Collecting feedback on usability and features
- Watch for patterns in complaints or confusion
- Using tools like Testflight (iOS) or Google Play Beta (Android)
Key metrics that ensure this testing is done properly:
Load time should be under 3 seconds
API response time should be under 200 milliseconds
Battery drain should be minimal for the functionality provided
Step 6: Deployment
Finally, it’s time to launch your app. In this stage, after months of hard work, we release the app to the world. The process might differ for each platform.
How to Prepare for launch:
Before the final launch, you need:
- App Icon
- Screenshots
- App descriptions
- Preview video
- Privacy policy
- Keywords
- Content rating
| iOS App Store submission | Google Play App Store Submission |
|---|---|
| Create an account in App Store Connect ($99/year) | Create a Google Play Developer account ($25 one-time fee) |
| Fill out app information and metadata | Complete store listing |
| Upload your app build | Upload your app bundle (AAB file) |
| Submit for review | Set pricing and distribution |
| Wait for approval (typically 24-48 hours, sometimes longer) | Submit for review (usually 1-3 days) |
| Apple is strict, they reject apps with bugs, poor performance, or guideline violations | Google is generally faster and less strict than Apple |
Step 7: Support and Performance Monitoring
Congratulations! At this stage finally your app is launched. But the work is not over, in fact ongoing maintenance is critical for long-term success.
Ongoing Maintenance Tasks
Bug Fixes: Address crashes and issues users report. Prioritize based on severity and how many users are affected.
OS Updates: When Apple releases iOS 18 or Google releases Android 15, you need to update your app for compatibility.
Feature Updates: Add new features based on user requests and data insights. Release updates every 2-4 weeks initially.
Security Patches: Fix vulnerabilities as they’re discovered. Security can’t wait.
Performance Optimization: Improve load times, reduce battery drain, optimize database queries.
Responding to User Feedback
- App store reviews are public and influence downloads:
- Respond to every review, positive and negative
- Thank users for positive feedback
- Address complaints professionally
- If there’s a bug, tell users you’re fixing it
- Update your response once the fix is released
Cost of Ongoing Maintenance
Budget for 15-25% of your initial development cost annually for maintenance. For a $100,000 app, expect $15,000-$25,000 per year minimum.
This covers:
- Bug fixes
- OS compatibility updates
- Security patches
- Minor improvements
- Server hosting costs
Major new features cost extra and should be budgeted separately.
Final Thoughts
The process of mobile app development takes time, approximately 3-9 months. But by following the above structure in detailed steps, you can increase your chance of making a successful app.
Building a mobile app is a big investment in 2026, unless it is created by following proven methods, and it is created with a concrete process. The most successful apps are the ones that genuinely solve users’ problems on the basis of their feedback.
Hence, stick to the process, keep a check on users’ needs and feedback, and be ready to make adjustments as you go.